

How to Bulk Upload and Label AI Product Images on Shopify Under the EU AI Act
 Damian Klimarczyk
English | EU AI Act (Article 50)
Damian Klimarczyk
English | EU AI Act (Article 50)
9 minute read
Table of Contents
- The Problem: AI Image Volume Meets EU AI Act Obligations
- The Two-Step Workflow
- Step 1: Bulk Upload AI Product Images from Google Drive or Dropbox
- Step 2: Bulk Label AI Images Under the EU AI Act
- Combined Workflow: Upload Then Label
- Who Needs This Workflow?
- FAQ
- Do I need to label images before or after uploading to Shopify?
- Can CS - Smart Bulk Image Upload connect to Google Drive and Dropbox?
- How does EU AI Label handle bulk labeling?
- Does bulk uploading replace my existing product photos?
- What if I also need labels on images shared outside Shopify?
- Is this legal advice?
- Get Started
If you use AI to generate or edit Shopify product images at scale, you face two jobs at once: getting hundreds or thousands of images into Shopify, and labeling the ones that qualify under the EU AI Act. Most merchants store AI outputs in Google Drive or Dropbox first — then hit a wall uploading them one by one and tagging each photo for Article 50 transparency. This guide walks through a two-app workflow that solves both problems: bulk upload from cloud storage, then bulk labeling with CoP-aligned disclosure icons.
The Problem: AI Image Volume Meets EU AI Act Obligations
Article 50 of the EU AI Act (Regulation (EU) 2024/1689) requires deployers who publish AI-generated or AI-manipulated visual content to EU consumers to disclose that involvement clearly and accessibly. For Shopify merchants, that typically means product photos: synthetic backgrounds, AI-generated lifestyle shots, AI-retouched catalog images, or fully AI-created product renders.
AI tools make it easy to produce images in bulk. What they do not solve is the operational follow-through:
-
Upload bottleneck — manually uploading 500+ images through Shopify admin is slow and error-prone.
-
Cloud-to-store gap — AI outputs often live in Google Drive or Dropbox folders, disconnected from your product catalog.
-
Labeling at scale — once images are live, each AI-generated or AI-modified photo needs a visible disclosure badge at first exposure, not a note buried in the product description.
-
Seasonal replacement cycles — swapping entire collections (summer to winter, campaign refreshes) means re-uploading and re-labeling in sync.
The fix is not one tool doing everything. It is a clear pipeline: get images into Shopify efficiently, then label the AI ones in bulk before they go live to EU shoppers.
The Two-Step Workflow
Here is the end-to-end process most merchants follow when scaling AI product photography under the EU AI Act:
-
Prepare & store — generate or edit product images with your AI tools; save them to Google Drive or Dropbox using a consistent filename convention tied to SKU, barcode, or product title.
-
Bulk upload to Shopify — use a bulk image uploader to match filenames to products and push images into your catalog in minutes, not days.
-
Bulk label for Article 50 — select all AI-generated or AI-modified photos in Shopify admin and apply CoP-aligned disclosure icons in one pass.
-
Preview & publish — confirm labels appear correctly on the storefront, then go live.
Steps 2 and 3 are where the right Shopify app stack saves the most time. Below we cover each in detail — starting with bulk upload Shopify from cloud storage, then Article 50 labeling at scale.
Step 1: Bulk Upload AI Product Images from Google Drive or Dropbox
For the upload step, we recommend CS - Smart Bulk Image Upload by Craftshift — a Shopify app built specifically for matching and importing large image batches from cloud storage.
Why CS - Smart Bulk Image Upload Fits AI Workflows
When you generate AI product images at volume, filenames and folder structure become your matching system. CS - Smart Bulk Image Upload connects directly to Google Drive and Dropbox, reads your folder contents, and auto-pairs images with the correct Shopify products or variants using:
-
SKU matching — e.g.
ABC123_1.jpg,ABC123_2.jpg(underscore + number controls image order) -
Barcode matching — exact or partial barcode in filename
-
Product title matching — exact title or title contained in filename
-
Metafield matching — match against custom product or variant metafield values
Key features for high-volume catalogs:
-
Preview matches before committing — catch mismatches before upload
-
Replace or keep existing product photos
-
Automatic resize for images over 20 MB or 20 megapixels
-
SEO-optimized automatic alt texts
-
Free plan for up to 25 images; unlimited uploads on Premium plans
Install and Connect
Get started in three steps:
-
Install CS - Smart Bulk Image Upload from the Shopify App Store.
-
Open the app from your Shopify admin and click Connect to link Google Drive or Dropbox.
-
Follow Craftshift’s step-by-step setup guide: How to Bulk Upload Product Images on Shopify with Smart Bulk Image Upload.
The Craftshift tutorial covers filename conventions, all 12 matching modes, previewing matches, executing the upload, and common pitfalls (typos in filenames, duplicate SKUs, metafield configuration). If you are launching a new catalog or replacing a full seasonal collection of AI-generated shots, start there.
Filename Tips for AI Image Batches
Before uploading, organize your cloud folders with a predictable naming pattern. This matters especially when AI tools export dozens of variants per product:
-
Use the exact SKU from Shopify:
SKU001_1.jpg(main),SKU001_2.jpg(alternate angle). -
Keep filenames short and identifier-first — the app reads underscores and trailing numbers to set image sequence.
-
Group AI lifestyle shots and AI product renders in separate subfolders if your team generates both types.
-
Always run Preview Match before Start Upload to verify pairings.
Once images are in Shopify, move to the disclosure step.
Step 2: Bulk Label AI Images Under the EU AI Act
Uploading gets Shopify product images into your catalog. Labeling satisfies your deployer obligations under the EU AI Act. That is where EU AI Label comes in.
EU AI Label is a Shopify app that overlays CoP-aligned disclosure icons on product photos — visible at first exposure, WCAG-accessible, and distinguishable from promotional badges. Under the EU AI Act, deployers need exactly this kind of on-image transparency. EU AI Label supports bulk selection so you can tag every AI-generated or AI-modified image in one session instead of one at a time.
Bulk Labeling Workflow in EU AI Label
-
Install EU AI Label at euailabel.app/install (free for up to 10 labeled photos).
-
Open the app in Shopify admin and go to your product photo library.
-
Select images in bulk — choose all photos you know are AI-generated or AI-modified (the batch you just uploaded from Drive or Dropbox).
-
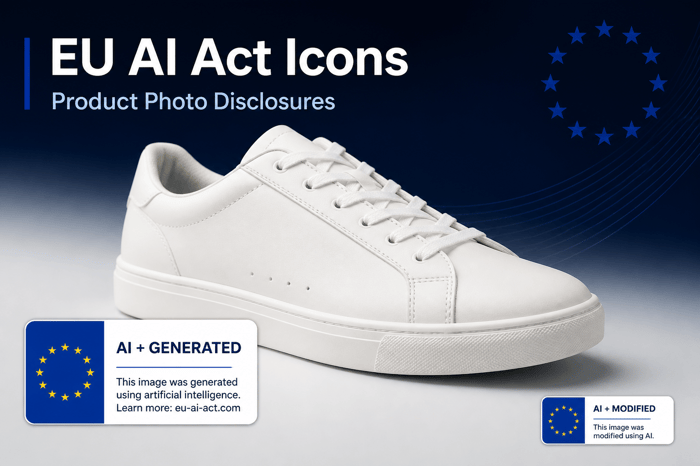
Pick your disclosure type — AI+GENERATED for fully synthetic images, AI+MODIFIED for AI-edited or AI-enhanced photos.
-
Adjust style and position — set corner placement, colors, and typography; contrast guardrails keep labels readable on any background.
-
Preview on the storefront — confirm labels render correctly via theme app extension (no theme code edits).
-
Publish — labels go live; metadata logs record who labeled what and when for your Article 50 audit trail.
Watch the EU AI Label demo on YouTube to see bulk selection and live preview in action.
Which Images Need an EU AI Act Label?
Not every product photo requires disclosure. Focus on images where AI involvement could mislead a shopper:
-
Fully AI-generated product renders or lifestyle scenes
-
AI-retouched backgrounds, inpainted objects, or generative fill edits
-
AI-extended catalog shots or synthetic model photography
Standard studio photography with no AI manipulation does not need a label. When in doubt, use the free Shopify AI Act product-photo checklist to audit your catalog before labeling.
Combined Workflow: Upload Then Label
Here is how the two apps work together for a typical seasonal AI image refresh:
| Stage | Tool | What you do | Output |
|---|---|---|---|
| 1. Generate | Your AI tools | Create or edit product images; save to Google Drive / Dropbox with SKU-based filenames | Organized image folders ready for import |
| 2. Upload | CS ‑ Smart Bulk Image Upload | Connect cloud storage, preview matches, bulk upload to Shopify products | Images live in your Shopify catalog |
| 3. Label | EU AI Label | Bulk-select AI images, apply AI+GENERATED or AI+MODIFIED icons, preview, publish | Article 50 disclosure badges visible on storefront |
| 4. Document | EU AI Label Compliance Hub | Review metadata logs and deployer role documentation | Audit-ready compliance record |
This pipeline scales whether you are uploading 50 images or 5,000. CS - Smart Bulk Image Upload handles the mechanical bulk upload Shopify import; EU AI Label handles the EU AI Act visibility layer merchants need before EU shoppers see AI product photos.
Who Needs This Workflow?
-
DTC brands using AI to generate or enhance product photography at catalog scale
-
Fashion, beauty, furniture, and home goods stores refreshing seasonal AI lifestyle collections
-
Agencies managing Shopify catalogs for clients with large AI image pipelines
-
Any merchant selling into the EU who stores AI outputs in cloud drives before pushing to Shopify
FAQ
Do I need to label images before or after uploading to Shopify?
After. Upload images to Shopify first using a bulk uploader like CS - Smart Bulk Image Upload, then label the AI-generated or AI-modified ones with EU AI Label. Labels render on the storefront via theme app extension — they do not need to be burned into the file before upload.
Can CS - Smart Bulk Image Upload connect to Google Drive and Dropbox?
Yes. The app supports both Google Drive and Dropbox. Connect your account in the app dashboard, authenticate folder access, and select images for bulk import. See Craftshift’s full setup tutorial for step-by-step instructions.
How does EU AI Label handle bulk labeling?
EU AI Label lets you select multiple product photos in Shopify admin and apply a disclosure icon (AI+GENERATED or AI+MODIFIED) to all selected images at once. You set style and position once, preview on the storefront, then publish. Metadata logs track every labeled image for your EU AI Act audit trail.
Does bulk uploading replace my existing product photos?
CS ‑ Smart Bulk Image Upload gives you the option to replace existing images or add new ones alongside current photos. Choose the mode that fits your workflow during upload setup.
What if I also need labels on images shared outside Shopify?
EU AI Label handles storefront overlays. For email, ads, social, or PDFs where the label must travel inside the file, use the free browser tool at euaiicon.com to burn a disclosure badge into the pixels. For website-wide image registries, see aiacticon.com.
Is this legal advice?
No. This guide describes a practical workflow for bulk upload Shopify product images and applying visible disclosure labels under Article 50 of the EU AI Act. Consult qualified counsel for your specific obligations.
Get Started
Scaling AI product photography under the EU AI Act does not have to mean manual uploads and one-by-one labeling. Connect your cloud storage with CS ‑ Smart Bulk Image Upload (follow the Craftshift setup guide), then bulk-label your AI images with EU AI Label — free for up to 10 photos. Work through the Shopify AI Act checklist, explore the full toolkit at aiact.solutions, and watch the demo to see labeling in action.
Related Articles
EU AI Label vs Product Labels & Badges—Lably
6 minute read
EU AI Act Article 50: What Shopify Stores Must Do
11 minute read